
REVIEW · CIRCLE ISLAND DAYS FROM WAIKIKI
PRIVATE Premium Circle Island Tour (12 Stops)
Oahu moves fast. This private Circle Island day plan keeps the best viewpoints, farms, and North Shore stops in one smooth route. It starts with big views (Diamond Head and Halona) and builds to the calmer coast and beach breaks, all while you avoid the stress of figuring out driving, parking, and timing.
I especially love the private, air-conditioned vehicle and the way the schedule gives you short, usable time at each stop. I also like the human touch: a guide named Treat is noted for making photo moments easier and handling mobility needs thoughtfully, which is exactly what you want when you’re paying for a premium experience.
One thing to consider: most stops are quick (often 10–20 minutes), so if you want long hangs at just one location, this tour’s pace may feel a bit like a highlight reel. It’s great for coverage, less ideal for slow tourism.
In This Review
- Key Things You’ll Notice on This Private Circle Island Tour
- Private Circle Island Comfort: What You’re Really Paying For
- The 7:00am Start and How the Day Flows
- Stop 1: Diamond Head Beach Park Lookouts (10 Minutes)
- Stop 2: Halona Blowhole (15 Minutes)
- Stop 3: Makapu‘u Point Lookout (10 Minutes)
- Stop 4: Byodo-In Temple Hawaii (30 Minutes; Admission Not Included)
- Stop 5: Tropical Farms Macadamia Nut Stop (20 Minutes)
- Stop 6: Mokoli‘i Island / Chinaman’s Hat (10 Minutes)
- Stop 7: Kula Stop at Ricky’s Brand Fruit Stand (15 Minutes)
- Stop 8: Kahuku Food Run with Tanaka Shrimp and Kua Aina (45 Minutes)
- Stop 9: Shark’s Cove (15 Minutes)
- Stop 10: Dole Plantation (30 Minutes)
- Stop 11: Historic Haleiwa Town (30 Minutes)
- Stop 12: Pupukea Beach Park (10 Minutes)
- What Makes This Tour Work for Different Travelers
- Value Check: Is $525 for Up to 4 People a Good Deal?
- A Few Practical Tips to Get the Most From This Day
- Should You Book the PRIVATE Premium Circle Island Tour?
- FAQ
- How many stops are included?
- What is the tour duration?
- What time does the tour start?
- Is pickup offered?
- Is this a private tour?
- What size group can you book?
- Is admission included at Byodo-In Temple?
- Are meals included?
- What language is the tour offered in?
- Do I get a mobile ticket?
Key Things You’ll Notice on This Private Circle Island Tour
- Pickup plus a private vehicle means you spend less time coordinating and more time watching the coast
- Air-conditioned comfort helps when Oahu heat ramps up later in the morning
- Photo-friendly stops with local guidance, including tips on good angles and practical pacing
- A balanced mix of views, culture, and food stops without turning the day into a single theme
- Mostly free admission stops, with the main paid add-on being Byodo-In Temple
Private Circle Island Comfort: What You’re Really Paying For
This is a private tour for up to 4 people, priced at $525 per group. For many visitors, the math makes sense because you’re effectively renting a driver for the day—plus getting a local who knows how to place you at viewpoints and time the route.
You’re not just buying roadside sightseeing. You’re buying less friction: pickup, a vehicle that’s kept cool, and a route that groups far-flung areas of Oahu so you don’t waste your vacation on highways and parking stress.
And because it’s private, your guide’s attention stays on your group. That matters more than it sounds. When you’re taking photos at places like Diamond Head lookouts or Makapu‘u, a couple of minutes can make the difference between clean angles and annoying backtracking. The tour’s format is built for that kind of real-world convenience.
The 7:00am Start and How the Day Flows
The day begins at 7:00am with pickup (look for the tour logos on the vehicle). The total duration is listed as about 6 to 7 hours, with travel time included. That matters because Circle Island can balloon quickly if you’re doing it yourself.
This schedule works like a sequence:
- Early “wow” viewpoints in the southeast and leeward sides of the island
- Midday cultural and farm stops
- Afternoon North Shore food and shoreline time
- A finish on the East/North coast with a beach park stop
Because the tour runs in one direction with stops planned, you get the feeling of a complete loop without the mental load. The tradeoff is the quick-stop format—expect each location to be a chance to see it well, not to camp there.
Other full loops around the island, lunch stops included
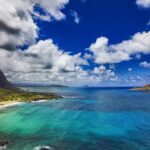

Stop 1: Diamond Head Beach Park Lookouts (10 Minutes)
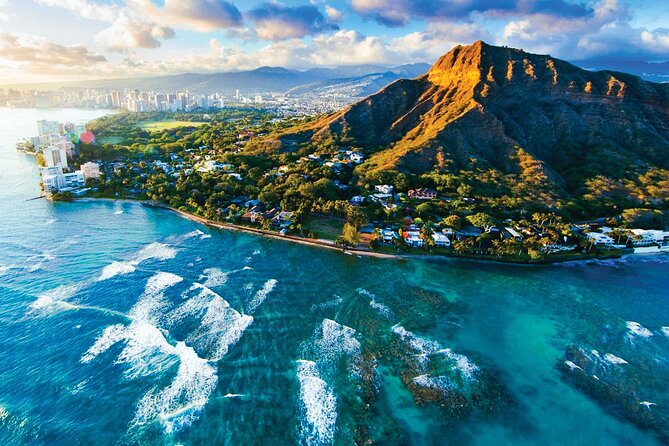
Diamond Head Beach Park gets you close to the outer edge of Diamond Head, with access to the Diamond Head and Kahala Lookouts. You’re positioned for panoramic views of the Pacific and Oahu’s southern coastline.
This is one of the best “start strong” stops on the whole day. Morning light tends to help photos, and the viewpoints give you a fast sense of orientation—so later beaches and coastlines feel connected instead of random.
Possible drawback: 10 minutes is just enough for a look, a few photos, and a quick scan. If you want to linger for a longer walk or a long photo session, you’ll need to decide what matters most and move with purpose.
Stop 2: Halona Blowhole (15 Minutes)
Halona Blowhole is a natural show. Waves push into the coastline, and through a lava-tube passage, seawater shoots upward through the blowhole. You get big motion, dramatic coastal rock, and that familiar Oahu feeling of raw ocean energy.
Fifteen minutes is the right length here because the blowhole action can be steady—or it can pause. You’re not stuck for an hour waiting; you’re there long enough to catch the moment and still move on.
Tip for your expectations: this is a nature spectacle, not a timed performance. If conditions are calm, you might see gentler action.
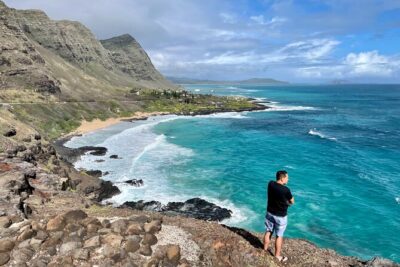
Stop 3: Makapu‘u Point Lookout (10 Minutes)
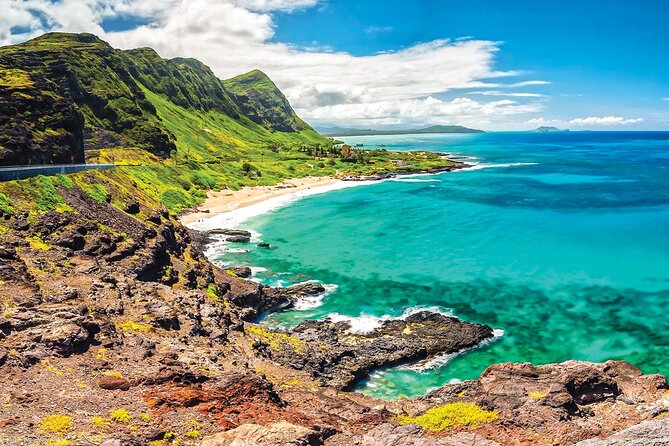
Makapu‘u Point brings you the kind of wide ocean view that makes you understand why people keep coming back to Oahu. The viewpoint sits above the southeastern coast with rugged cliffs and a horizon that feels endless.
There’s also a whale-spotting note: this area can offer humpback whales during their seasonal migration. You won’t control the ocean, but having a dedicated lookout moment gives you a real chance to spot movement.
Possible drawback: short time means you’ll want to be ready to point, zoom, and shoot fast. If your camera takes a moment to focus, plan to practice before you’re on the scenic edge.
Your own van and driver, more ways to fill the day
- Honolulu Airport, Cruise Port and Hotels Private Transfer
★ 5.0 · 452 reviews - Honolulu Airport: Waikiki Private Transfer With Lei Greeting
★ 5.0 · 339 reviews - Private Customizable Grand Circle Island Tour of Oahu
★ 5.0 · 243 reviews - Private Pearl Harbor and Honolulu City Tour
★ 5.0 · 214 reviews
Stop 4: Byodo-In Temple Hawaii (30 Minutes; Admission Not Included)
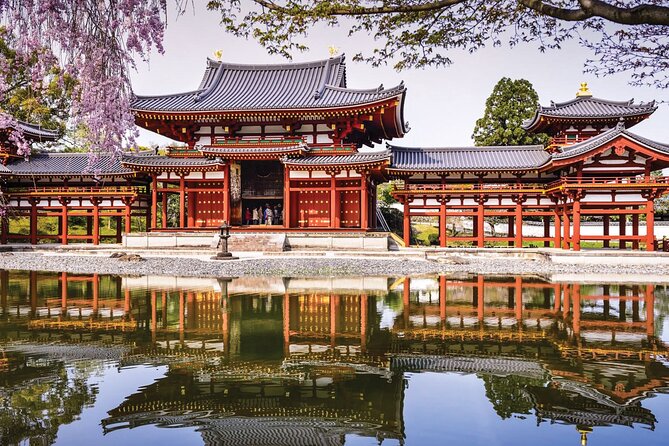
Byodo-In Temple is where the day slows down. Modeled after a 900-year-old Japanese temple, it’s a quiet break from coastline sprinting. You’ll pass through temple gates and spend time with the gardens and koi-filled ponds. There’s also a sacred bell you can ring, if you want a small moment of reflection.
The time here is longer—30 minutes—which helps because this is more about atmosphere than photo angles.
Cost note: admission isn’t included, listed at $2–$5. This is the only clear paid add-on mentioned, so you can plan your budget accordingly.
Possible drawback: it’s not the kind of stop where you’ll want to rush. If your group is more “views only” than “slow and cultural,” this may feel like a pause in the action.
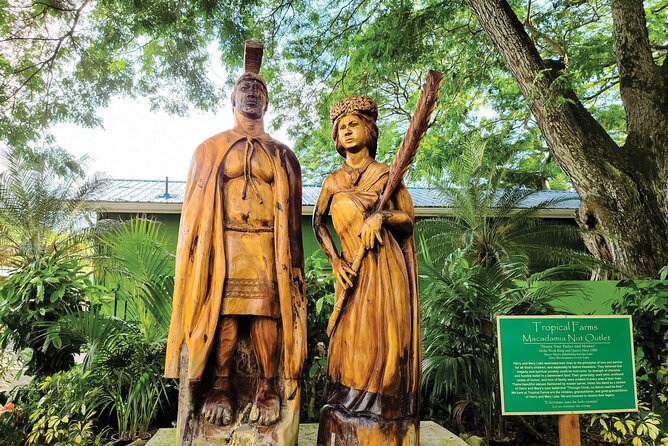
Stop 5: Tropical Farms Macadamia Nut Stop (20 Minutes)
If you like food souvenirs (and who doesn’t), Tropical Farms is a strong mid-tour hit. You’ll smell freshly roasted macadamia nuts, then browse a store full of nut-based treats—ice cream, roasted nuts, and other snack options.
This stop is useful even if you don’t buy much. It gives you a sense of how Hawaii flavors get packaged for visitors without it turning into a long shopping detour.
Possible drawback: 20 minutes is tight for serious shopping. If you want to compare items or bring home several varieties, pick your must-buys fast.
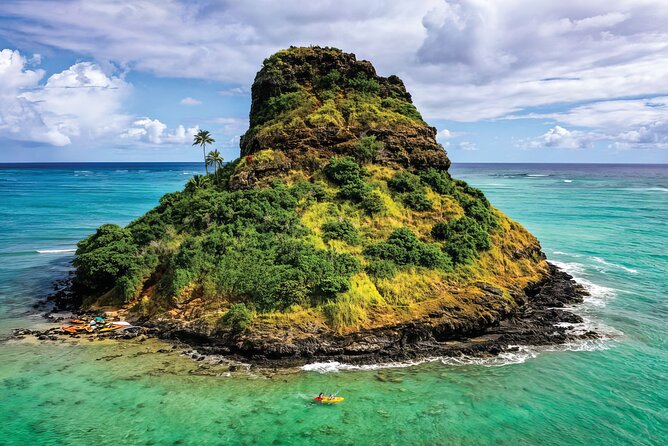
Stop 6: Mokoli‘i Island / Chinaman’s Hat (10 Minutes)

Mokoli‘i Island is the famous silhouette often called Chinaman’s Hat. From Laie Point State Wayside Park, you’ll see the straw-hat shape rising from the water. This is a photo stop with instant recognition.
This is also a great “breather” stop in the itinerary. After farms and temples, it’s back to simple scenery—ocean, a single iconic target, and quick viewpoints.
Possible drawback: if photos are your main goal, 10 minutes can vanish quickly. Make sure everyone has their shot priorities before you arrive.
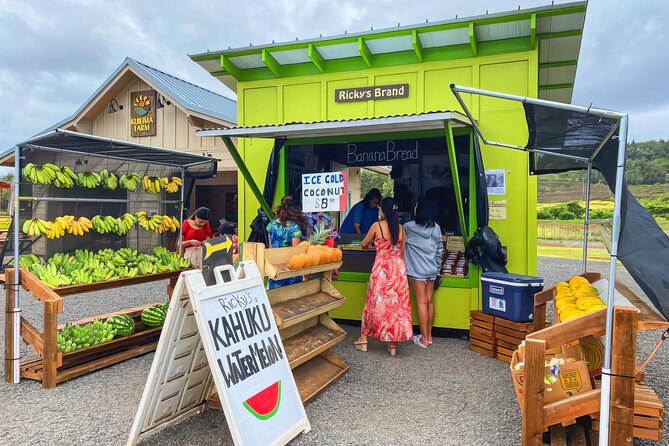
Stop 7: Kula Stop at Ricky’s Brand Fruit Stand (15 Minutes)
This is a short cultural food stop with real local flavor: Ricky’s Brand Fruit Stand. The point isn’t a formal tour—it’s the chance to see what’s fresh and seasonal. You’ll find pineapples, bananas, mangoes, coconuts, and more, served with friendly Hawaiian hospitality.
What makes this stop worth it for your money is that it’s not pretending to be a “museum” of fruit. It’s a real roadside moment, and that’s where you tend to feel the day shift from sightseeing into everyday Hawaii.
Possible drawback: there’s only 15 minutes. If you’re planning to buy a lot of fruit to snack on later, you’ll want to do it early.
Stop 8: Kahuku Food Run with Tanaka Shrimp and Kua Aina (45 Minutes)
Kahuku is where the tour becomes a food-focused stretch. You’ll spend 45 minutes here, with two big options: Tanaka Shrimp and Kua Aina.
At Tanaka Shrimp, the focus is garlic-and-butter style shrimp—warm, filling, and classic North Shore energy. At Kua Aina, you’ll find burgers, sandwiches, and salads, with a relaxed vibe built for stopping and eating without rushing.
This is one of the best parts of the schedule because the time is long enough to actually eat, not just grab a bite. And it breaks up the longer viewpoint sequence.
Possible drawback: choose your plan before you arrive. With two eating spots in one stop window, you don’t want your group spending extra minutes debating while everyone’s getting hungry.
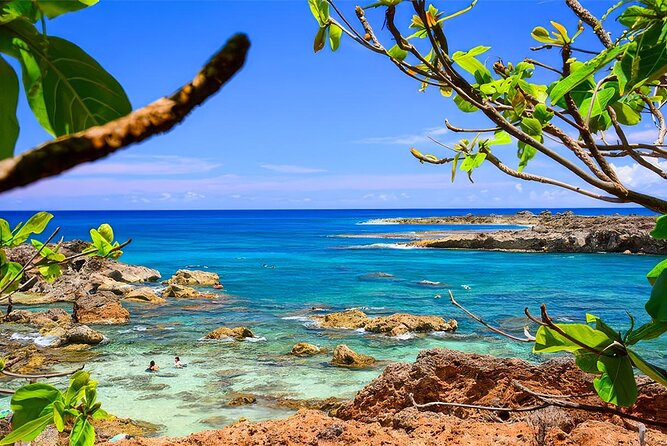
Stop 9: Shark’s Cove (15 Minutes)
Shark’s Cove is a North Shore shoreline moment with clear water and marine life visibility. The description points to it as a place for swimmers and snorkelers, with a calm, reefy feel in the right conditions.
Even if you don’t get in the water, it’s worth seeing for the clarity and the way the coast is set up for ocean time.
Possible drawback: snorkeling is weather- and water-condition dependent. The tour doesn’t promise equipment or guided water time based on the details provided—so treat this as a chance, not a guarantee.
Stop 10: Dole Plantation (30 Minutes)
Dole Plantation is the pineapple centerpiece. Expect interactive exhibits, gardens, and options like a train ride and pineapple maze. You can also grab pineapple treats—basically the full “pineapple experience” package.
Thirty minutes is enough to move through the main attractions, take your photos, and leave without feeling trapped in a theme-park loop.
Possible drawback: if you’re pineapple-cautious (or you’ve already done similar attractions elsewhere), this stop may feel a little touristy. The value here is convenience: it’s fast, structured, and easy to fit into a loop tour.
Stop 11: Historic Haleiwa Town (30 Minutes)
Haleiwa is where you slow down a touch and get local textures. Historic Haleiwa Town is known for plantation-era architecture, surf culture, and storefront browsing. It’s also where you can pick up souvenirs, art, and casual snacks without the feel of a scripted stop.
The time here is 30 minutes, which helps. You’ll have enough space for a simple walk, a few photo opportunities, and a quick browse—then you’re back on the road.
Possible drawback: if your group’s idea of “relaxing” is sitting still, Haleiwa can feel like you should be moving. Bring shoes that work for uneven pavement.
Stop 12: Pupukea Beach Park (10 Minutes)
The final stop is Pupukea Beach Park, a coastal finish with sandy shoreline, turquoise water, and nearby tide pools. The description also points you toward nearby surf spots like Pipeline and Sunset Beach, even if you’re just taking it in from the park area.
This ending is smart: after the food and town stop, it gives you one last ocean reset. Ten minutes won’t turn into a full beach day, but it’s a nice way to end the loop while you still have energy.
Possible drawback: a short beach stop means you’ll want to be decisive. If someone needs shade or the group wants tide pool photos, move quickly to avoid the time slipping away.
What Makes This Tour Work for Different Travelers
This tour is built for people who want variety without decision fatigue. It’s especially strong if:
- You’re short on time and want a full Oahu overview in one day
- You’d rather enjoy the ride than manage driving and parking
- Your group wants a guide with practical attention—including clear photo pacing
It may be less ideal if:
- Your group loves long stops at a single beach or viewpoint
- You’re the type who wants a lot of walking every hour
- You dislike structured itineraries and prefer free-form days
It’s also a good fit for mixed-ability groups because the notes about guide help for mobility needs show that the experience can adapt at the stop level (timing, positioning, and photo angles).
Value Check: Is $525 for Up to 4 People a Good Deal?
At $525 per group up to 4 people, the big question is: are you saving time and stress compared with driving yourself, plus paying for a driver and a guide?
You get:
- Pickup service
- A private air-conditioned vehicle
- 12 organized stops across multiple parts of the island
- Mobile ticket
- A guide who can pace the day for your group
You don’t get:
- Food expenses
- Byodo-In Temple admission fees ($2–$5)
- Any unspecified costs beyond the basics
For families or small friend groups, this pricing often feels fair because your per-person cost drops quickly when you fill the group limit. If you’d be renting a vehicle anyway, you should consider the value of not dealing with traffic, parking hunts, and a day of constant navigation.
A Few Practical Tips to Get the Most From This Day
- Wear sun protection: the tour specifically calls out beating the heat, and several stops are outdoors.
- Decide your must-photo moments before you stop; 10–20 minutes moves fast.
- Budget for Byodo-In Temple admission and your own meal choices at the North Shore food stop.
- If your group includes anyone with mobility needs, the private format helps—just communicate what pace works.
Should You Book the PRIVATE Premium Circle Island Tour?
I’d book it if you want a high-coverage Oahu day that trades stress for comfort. The private vehicle, air-conditioned perk, pickup, and guide focus are the core reasons this works—plus the stop lineup hits viewpoints, culture, and North Shore flavor in one loop.
Skip it if you hate short stops and you’d rather spend your whole day in one area. This is for people who like seeing a lot, getting photos, and then heading back to your base without the headache of planning.
If you’re traveling with up to four people and you want the day to run like someone else already worked it out, this one’s a strong match.
FAQ
How many stops are included?
This tour includes 12 stops around Oahu.
What is the tour duration?
It runs about 6 to 7 hours, with travel time included.
What time does the tour start?
The start time is 7:00am.
Is pickup offered?
Yes. Pickup is offered, and you should look for tour logos on the vehicle.
Is this a private tour?
Yes. It’s private, and only your group will participate.
What size group can you book?
The pricing is per group up to 4 people.
Is admission included at Byodo-In Temple?
Byodo-In Temple admission is not included, and it’s listed at $2–$5.
Are meals included?
Food expenses are not included. Optional coffee/tea/snack stops are mentioned, but food is still on you.
What language is the tour offered in?
The tour is offered in English.
Do I get a mobile ticket?
Yes. The tour includes a mobile ticket.
Also on the Honolulu List
- Oahu Grand Circle Island and Haleiwa Tour: 9-Hr Deluxe Experience★ 5.0 · 17,387 reviews
- Oahu: Grand Tour Around Island 16 Locations plus Snorkeling★ 5.0 · 8,669 reviews
- Salute to Pearl Harbor Including USS Arizona★ 4.5 · 7,433 reviews
- Majestic Circle Island Tour with Lunch★ 5.0 · 7,014 reviews
An Itinerary of Your Own
- Honolulu Airport, Cruise Port and Hotels Private Transfer★ 5.0 · 452 reviews
- Honolulu Airport: Waikiki Private Transfer With Lei Greeting★ 5.0 · 339 reviews
- Private Customizable Grand Circle Island Tour of Oahu★ 5.0 · 243 reviews
- Private Pearl Harbor and Honolulu City Tour★ 5.0 · 214 reviews
Around the Island and Back by Dinner
- Oahu Grand Circle Island and Haleiwa Tour: 9-Hr Deluxe Experience★ 5.0 · 17,387 reviews
- Oahu: Grand Tour Around Island 16 Locations plus Snorkeling★ 5.0 · 8,669 reviews
- Majestic Circle Island Tour with Lunch★ 5.0 · 7,014 reviews
- Oahu Circle Island Tour with Turtle Snorkeling— Small-Groups★ 5.0 · 5,214 reviews
The Latest from Kalakaua Avenue and Beyond


Circle Island Days from Waikiki, compared.
 ★ 5.0Grand Tour Around Island 16 Locations plus SnorkelingFrom $1098,669 reviews
 ★ 5.0Majestic Circle Island Tour with LunchFrom $1817,014 reviews
 ★ 5.0Oahu Circle Island Tour with Turtle Snorkeling— Small-GroupsFrom $1495,214 reviews
 ★ 5.0All Inclusive Ultimate Circle Island Tour, Waimea Falls & LunchFrom $1563,067 reviews
 ★ 5.0Oahu Grand Circle Island Experience from WaikikiFrom $992,317 reviews
 ★ 4.5Oahu Deluxe Grand Circle Island TourFrom $1452,123 reviews
 ★ 5.0Premium Oahu Circle Island Tour – Small Group, No CrowdsFrom $1151,709 reviews
 ★ 4.5Sights & Bites Ultimate Oahu Circle Island Foodie Tour492 reviews
Browse the lists this tour appears in